How to Start a Press-On Nail Business From Home (Legal, Supplies & Setup)
Thinking about starting a press-on nail business from home… but not really sure where to start?
I’ve been there.
When I first started, I remember feeling excited but also very overwhelmed. There were so many questions. What do I actually need? How much should I spend? What’s required legally? It felt like there were a hundred things to figure out before even making my first set.
So in this post, I want to walk you through everything I wish I knew when I started. If you prefer watching, here’s the full video version:
1. Decide Your Business Model
Before you go on Amazon or AliExpress and start adding everything to your cart… pause for a second.
One of the biggest mistakes beginners make is buying supplies before they actually decide what kind of business they want to run.
And trust me, your business model affects everything:
- how much you spend
- how you price
- how you create
- and how you grow
There are three main ways to run a press-on nail business.
Custom Press-On Sets
This is the most beginner-friendly option. You create designs, and customers order based on their size and the designs they want. You’re not making inventory ahead of time. You’re making each set when it’s ordered.
The biggest advantage here is low risk. You’re not sitting on unsold inventory, and you can start with a smaller budget. It also feels more personal, which a lot of customers really like.
But it does come with trade-offs. It can get time-consuming, especially once orders start coming in. You’ll also spend more time talking to customers, and sometimes you’ll need to adjust designs based on requests.
Ready-to-Ship Sets
This is where you create sets in advance and sell them as-is. It sounds ideal: faster shipping, less communication, and easier to scale. And yes, all of that is true.
But here’s the reality: you’re guessing what people want before they buy.
That means:
- you might have unsold sets
- you’ll need more upfront investment
- you need some understanding of trends or demand
This works much better when you already have an audience or know what sells.
Hybrid Model
This is a mix of both, and it’s what I personally do.
You offer:
- a few ready-to-ship designs
- some made-to-order options
I like this model because it gives you flexibility. You can test what people like without committing too much upfront. But it does require more organization since you’re managing both systems.
2. Legal Things to Check
I know this part can feel a little intimidating, so let’s keep it simple.
Quick disclaimer: I’m not a lawyer or an accountant. This is based on my experience in Ontario, Canada, so always double-check what applies in your area.
Business Registration
First, business registration. If you’re not using your legal name, you’ll likely need to register your business. Most beginners start with a sole proprietorship.
Also, check your business name early. Make sure it’s available across platforms. I learned this the hard way. I had a name in mind but couldn’t even create an Instagram account because someone else was already using it.
Running a Business From Home
Next, check whether you can legally run a business from home. Look into your city’s by-laws. Depending on where you live, there may be rules around things like:
- storage
- customer pickups
- noise
For press-on nails, most of us are shipping orders, so you’ll likely be fine. But it’s still worth checking. It only takes a few minutes and can save you a lot of headaches later.
Taxes
I know, not the fun part, but very important. Even if you’re just starting, track your income and expenses from day one. In Canada, once you reach about $30,000 in revenue, you’ll need to register for GST/HST.
Also, keep your receipts. Everything adds up:
- supplies
- packaging
- tools
Future you will thank you during tax season.
Insurance
Lastly, insurance. It’s not required right away, but it is something to think about as you grow. If you plan to sell at local markets, some of them may require liability insurance. At the end of the day, it’s about protecting yourself, especially once your business starts growing.
3. What You Actually Need to Start
Let me say this first, because I wish someone told me this earlier:
You do not need a full nail studio to start a press-on nail business.
You do not need every trending gel color, every tool on TikTok, or a perfectly aesthetic setup.
I started on a budget, and honestly, you can do a lot with just the basics. What matters more is how you use what you have, not how much you have.
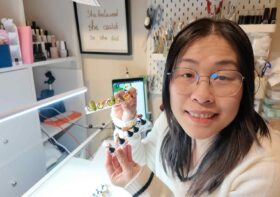
Your Setup
A simple desk and chair is enough.
I personally use an IKEA setup because it’s affordable and easy to clean. If you’ve worked with acetone before, you’ll understand why that matters.
Nail Supplies
This is where it’s really easy to overspend. I’ve been there.
When you’re starting out, focus on the essentials. You do not need every color or every tool, just the ones you’ll actually use to create your first few designs.
Here is a simple starter list:
- nail tips. I personally use Apres because I trust the quality and I’m familiar with the sizing system
- gel polish. Beetles and Modelones are great beginner-friendly options
- base coat and top coat
- UV or LED lamp
- files and buffers
- nail stand or holder
- detail brushes or dotting tools
- alcohol or acetone, depending on your preference
As you start creating more designs, you can slowly add more colors or tools. In the beginning, keeping it simple will save you a lot of money and overwhelm.
Packaging
Your packaging does not need to be complicated or expensive.
What matters most is that it is clean, organized, and gives your customer a good experience when they open it.
A basic starter kit can include:
- nail glue or adhesive tabs
- cuticle stick
- nail file and buffer
- alcohol wipe
- thank you card
- packaging such as bags or small boxes
You can always upgrade your packaging later once you start getting consistent orders.
If you need help with your display cards, I created a free Canva template you can use: Press-On Nail Display Card Template
Content Setup
A lot of people think they need a full content studio to sell press-ons. You really do not. A simple setup works perfectly fine:
- natural light by a window or a basic desk lamp
- a phone tripod
That is enough to start.
Clear, well-lit photos and videos will always perform better than overly styled but unclear content. People want to see your designs clearly.
One Thing I’d Do Differently
If I could go back, I would spend less on cute things and more on things that actually improve my product.
When I closed my in-person studio, I realized how many supplies I bought just because they looked nice, and I barely used them. That was a big lesson for me.
4. Set Up Your Shop
Now let’s talk about setting up your shop.
Right now, I’m using Etsy to sell my press-on nails. I know a lot of people also use Shopify, but personally, since I’m not making enough yet to justify the extra cost, Etsy makes more sense for me at this stage.
If you’re just starting, I would recommend focusing on one platform first. Keep it simple. You can always expand later once you understand your workflow and start getting consistent orders.
At this stage, your goal is not to make everything perfect. It’s to get your shop up and running.
What You Actually Need to Set Up
When you’re setting up your shop, here are the key things to focus on:
- set up your shop profile and basic branding
- create a clear sizing system
- write realistic processing times
- add simple care instructions
- clearly explain what the customer will receive
- set up your shop policies
This might sound like a lot, but once you go through it step by step, it’s very manageable.
Be Clear With Your Policies
This is especially important if you are offering custom press-on sets.
You want to be very clear about things like:
- no returns or exchanges for custom sets
- processing times
- shipping expectations
- sizing responsibility
It might feel a bit uncomfortable to write strict policies at the beginning, but it actually protects both you and your customer.
Clear expectations mean fewer problems later.
Keep It Simple at the Beginning
One thing I’ve learned is that your shop does not need to look perfect before you launch.
You do not need:
- 20 listings
- perfect branding
- a full collection
Start with a few designs, set up your listings properly, and focus on getting your first order. You can always improve and update your shop as you go.
A Little Help If You Need It
If you want something to help you stay organized while setting everything up, I created a Press-On Startup Checklist that you can print out or use digitally, based on everything I wish I had when I started.
It includes:
- a starter checklist
- a supply checklist
- a client sizing tracker
It is meant to help you stay organized as you are setting everything up.
5. Pricing Basics
Let’s talk about pricing. I’m not going to go super deep here because I already have a full video on how I price my press-on nails, but I do want to cover the basics here.
At minimum, your pricing should include:
- your materials
- packaging
- your time
- platform fees (like Etsy fees)
- shipping supplies
- and your profit
Out of all of these, the one people forget the most is your time. And I get it. When you’re just starting, it can feel weird to charge more for something you’re still learning. But your time matters.
If a set takes you two or three hours to make, that needs to be reflected in your pricing. Otherwise, you’re going to burn out very quickly.
You don’t need to get your pricing perfect right away. You can adjust as you go. But at least make sure you’re not undercharging to the point where it’s not sustainable.
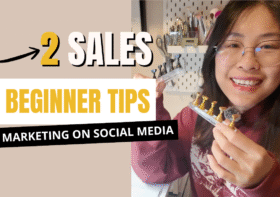
6. Create and Launch Your First Collection
Now let’s talk about your first collection, because this is where things start to feel real. You do not need to launch with a huge collection. Start with 3 to 5 designs.
I know it’s tempting to create a lot because it’s fun, but too many designs in the beginning can actually slow you down and overwhelm you. Instead, keep it intentional. Choose:
- a few styles people already wear
- one or two slightly trendy designs
- and something that feels like your personal style
This helps you test what people actually like without overcommitting your time or supplies.
Start Posting Before You Launch
This part is very important, and something I wish I understood earlier. Start posting before your shop is even ready. This is how people discover you before you even have products available.
You can start sharing:
- your process
- your setup
- your sizing kits
- packing practice orders
- your beginner journey
- what you’re learning along the way
People love seeing the behind-the-scenes, especially when you’re just starting. And it helps build trust before you even make your first sale.
You Don’t Need a Big Launch
You don’t need a full collection, a perfect brand, or everything figured out. Start small. List a few designs, focus on clear photos, and aim for your first order.
That first sale will teach you more than anything else.
Pay Attention to What Works
Once you start posting and listing your products, pay attention to what people respond to. Look at:
- what designs get the most attention
- what questions people ask
- what content performs better
Use that information to guide your next designs and decisions. This is how you grow your business in a smart way, instead of guessing everything.
Final Thoughts
Starting a press-on nail business from home is absolutely possible.
It becomes so much easier when you understand the basics, start small, and focus on the right things first.
You don’t need everything figured out from the beginning. Most of it, you’ll learn as you go.
The important part is just getting started.
Good luck on your journey and let me know if you have any question.
Want more behind-the-scenes tips and honest reflections?
Check out The Nail Files blog series — where I share real experiences from running (and now closing) my nail business at home.
Related Posts:
- How to Price Handmade Press-On Nail Sets (as a Beginner)
- How to Create a Custom Press-On Nail Set
- How To Do Your Own Gel Nails at Home Like a Pro (Step-by-Step)
- Best Tools for DIY Nails: My Must-Haves List
Tools I Use & Recommend (Affiliate Picks)
These are the exact tools I use in my setup and prep process. I’ve added affiliate links below so you can shop them easily — I only recommend what I actually use:
PRESS-ON SUPPLIES:
- Press-on Nail Holder Set → https://geni.us/g57oC [Amazon]
- Waterproof 5×8 Bubble Mailers → https://geni.us/qAQkrZ [Amazon]
- Phomemo Bluetooth Thermal Label Printer → https://geni.us/UAQcH [Amazon]
NAIL STUDIO MUST HAVE:
- LED Desk Lamp with Clamp → https://geni.us/rjZD9S7 [Amazon]
- MelodySusie Rechargeable Nail Dust Collector → https://geni.us/1WLLoiI [Amazon]
- Nail Dryer for Regular Polish → https://geni.us/dI5qk [Amazon]
- UV Nail Lamp 220W, UV Light for Gel Nails → https://geni.us/OaAwX4 [Amazon]
- Electric Nail Drill Machine → https://geni.us/z2trm6 [Amazon]
MY FILMING GEAR:
- DJI Osmo Pocket 3 Creator Combo → https://geni.us/qSyHM [Amazon]
- Phone Holder for Filming → https://geni.us/4HZXpzA [Amazon]