How To Do Your Own Gel Nails At Home Like A Pro (Step-by-Step)
This post contains affiliate links. I may earn a small commission if you shop through them — at no extra cost to you.
As a nail tech, I’ve worked with different types of nail products on various clients, but I love using gel polish on myself because of its durability and ease of application. I find it easier to work with gel polish using my non-dominant hand compared to gel builder or dipping powder.
While gel polish doesn’t last as long as gel builder or dipping powder, with proper care, the right tools, and correct techniques, you can achieve a salon-quality manicure that lasts for weeks. In this guide, I’ll walk you through everything you need to know to do your own gel nails like a pro.
Removing gel? Follow this: Step-by-Step: Remove Your Gel Nails at Home (With and Without Acetone).
What Tools Are Needed for a DIY Gel Manicure?
Before we get started, let’s gather the necessary tools:
Nail Prep Tools:
- An old hand towel or paper towel
- Nail file and buffer
- Cuticle pusher and trimmer
- Isopropyl alcohol (rubbing alcohol)
- Acetone (if you need to remove old gel polish)
- Cotton pads or lint free nail wipes, you also can cut paper towel to small pieces
- Nail clippers (for shaping and trimming)
- Nail dehydrator (optional but enhances longevity)
Gel Nail Kit
- Nail primer (optional, but highly recommended)
- Base coat + Top Coat
- Gel polish (your preferred color)
- UV/LED lamp (required for curing gel polish)
After Care Kit:
- OPI cuticle oil (for aftercare)
- Hand Cream (optional)
Optional Nail Art Supplies
If you love adding creative designs to your nails, consider having:
- Nail stickers or decals
- Glitter gel polish
- Nail striping tape
- Nail art brushes + dotting tool set for intricate designs
- Nail rhinestones and adhesive
Master DIY Nail Art at Home
Sign up for exclusive DIY nail tips, tricks, and tutorials to help you achieve flawless nails at home.
Thank you!
You have successfully joined our subscriber list.
Step-by-Step Guide to Applying Gel Nails at Home
Step 1: Nail Prep
- Use an old hand towel to cover your workspace and protect furniture from acetone or alcohol stains.
- Remove any old nail polish with acetone. (For a step-by-step guide on gel removal, check out this post.)
- Push back your cuticles with a cuticle pusher, then trim them carefully.
Tips:- Soak your hands in lukewarm water for 5-10 minutes beforehand to soften cuticles.
- Only trim dead, lifted, or excess cuticle—avoid cutting too close to the skin.
Hold the cuticle nippers at a 45-degree angle and make small, controlled snips.
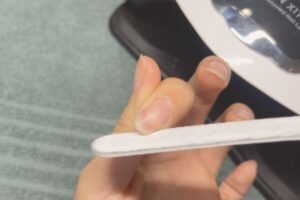
- Trim your nails to your preferred length using nail clippers. Then, shape them into your desired style with a nail file. Not sure how to shape your nails? Learn the basics here: How to Shape Your Nails at Home for Beginners.
- Buff the nail surface to create a slightly rough texture for better polish adhesion.
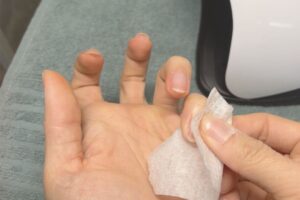
Tip: Use a smaller buffer for easy access to all corners of the nail, ensuring the surface in those areas is properly roughened. I’ve seen many cases where the corners weren’t prepped correctly, causing the gel polish to peel off soon after application. - Soak a cotton pad or a small piece of paper towel with 70% isopropyl alcohol, then wipe your nails thoroughly to remove oils and debris.
Step 2: Applying Nail Primer (Optional)
- Applying one quick coat of nail primer before the base coat helps remove natural oils and ensures nails are dry and ready for gel application.
Step 3: Applying the Base Coat
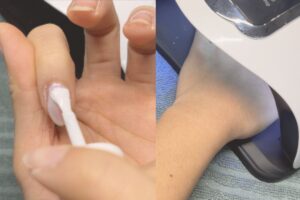
- For gel polish application, apply a thin layer of gel base coat. Use the brush firmly to create an even coat, avoiding contact with the skin or cuticles to prevent lifting.
- Cure under a UV/LED lamp for 60 seconds.
Step 4: Applying Gel Polish Color
- Depending on the opacity of your gel polish, you may need 2 to 3 layers. Avoid applying thick layers, as they won’t cure properly and can create bubbles.
- Apply a thin, even first coat of gel polish. Cap the edges by running the brush along the tip to prevent chipping.
- Cure under the lamp for 60 seconds.
- Repeat with a second (or third) coat for full opacity, curing after each layer.
Tip: If using multiple colors or doing nail art, cure between each layer to prevent smudging.
Step 5: Sealing with the Top Coat
- Apply a thin top coat to seal the color and add shine. Remember to seal the tips to prevent chipping.
- Cure under the lamp for 60 seconds.
Tip: Cure twice to ensure everything is fully set.
Step 6: Finishing Touches
- Wipe nails with a cotton pad and isopropyl alcohol to remove any sticky residue.
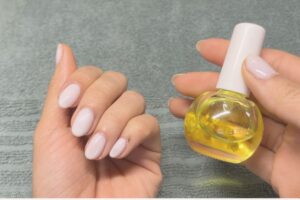
- Apply cuticle oil to the top of your nails and gently massage it in to ensure even hydration.
- Optional: Massage your hands with a hydrating hand cream for extra moisture.
If you need to remove the old gel, check out this guide: Step-by-Step: Remove Your Gel Nails at Home (With and Without Acetone).
Common Mistakes & Troubleshooting Tips
Why Are My Gel Nails Peeling Off?
Peeling can occur due to improper prep, uncured gel, not sealing the tips, or external factors like exposure to cleaning products or hot water without gloves.
Tips:
- Ensure nails are completely free of oils before application.
- Avoid getting polish on the skin or cuticles.
- Cap the free edge to prevent lifting.
Why Do My Gel Nails Have Wrinkles or Bubbles?
Wrinkling or bubbling usually happens when the gel polish hasn’t been properly cured.
Tips:
- Apply thin layers—thick layers won’t cure correctly.
- Gently tap on your nails to check if each layer is fully cured and dry before applying the next one.
Why Do My Gel Nails Feel Sticky After Curing?
Most gel polishes leave a tacky layer after curing to allow stacking multiple layers. If your nails still feel sticky after applying the top coat, try:
- Wipe with isopropyl alcohol to remove the tacky layer.
- If nails remain sticky, the polish may not have cured properly.
How to Make Gel Nails Last Longer
If you want your gel manicure to last even longer, follow these extra care tips or check out my blog on 10 tips to make gel nails last longer for more in-depth advice:
- Use gloves when washing dishes or cleaning to prevent your nails from coming into contact with harsh chemicals.
- Avoid exposing your nails to excessive heat right after curing.
- Keep your cuticles hydrated with regular application of cuticle oil.
- Avoid putting stress on your nails by using them to open or scratch objects.
Master DIY Nail Art at Home
Sign up for exclusive DIY nail tips, tricks, and tutorials to help you achieve flawless nails at home.
Thank you!
You have successfully joined our subscriber list.
Doing your own gel nails at home can be frustrating at first, but don’t worry! With practice and patience, you can master the art of DIY gel nails. Not only will you save money, but you’ll also have the flexibility to switch up your nail colors whenever you like. I hope this step-by-step guide helps you get started on your DIY nail journey. Soon, you’ll be creating long-lasting, salon-worthy manicures from the comfort of your home!
Have you tried doing your own gel nails at home? Share your experience in the comments below!
Affiliate Disclosure: That Pretty Nail is a participant in the Amazon Services LLC Associates Program. As an Amazon Associate, I earn from qualifying purchases. This helps support the blog at no extra cost to you.
Shop My DIY Gel Nail Essentials
Here are the exact tools I use for my at-home gel nail routine:


