Nail File Grit Guide: Which grit to use for natural nails, gel, and press-ons

This post contains affiliate links. I may earn a small commission if you shop through them — at no extra cost to you.
100, 180, 240… if you’ve ever picked up a nail file and wondered what those numbers actually mean, you’re not alone. There are so many options, and the file you use to shape a press-on isn’t necessarily the one you want on your natural nails.
The easiest thing to remember? Lower number = coarser file. Higher number = finer file.
For a beginner doing their nails at home, 240 grit is a good starting point for shaping natural nail edges. A 180 grit file can suit healthy natural nail edges and some product-specific surface-prep routines, as well as shaping many gel enhancements and press-ons. A 100 grit file is a coarser option for suitable enhancement product. It should stay off your natural nails.
Let’s break down what those numbers mean and how to choose a file for the job.
What does nail file grit mean?
Grit describes the coarseness of a nail file’s abrasive surface. A coarse file removes material quickly. A finer file removes less with each pass, giving you more control over small adjustments.
A file marked 100/180 has 100 grit on one side and 180 grit on the other. A 180/240 file has a medium side and a finer side.
Those numbers tell you about the abrasive surface, but the file’s construction matters too. A rigid board and a cushioned buffer with the same grit number won’t necessarily feel or behave the same way. Always check what the tool is designed to do.
100 vs 180 vs 240
| Grit | General feel | Common uses | What to watch for |
|---|---|---|---|
| 100 | Coarse | Reducing thickness or length on suitable artificial enhancements, according to the product system | Removes material quickly. Keep it off the natural nail and surrounding skin. |
| 180 | Medium | Shaping healthy natural nail edges when appropriate; shaping enhancements and press-ons; surface prep only when the product system specifies it | Requires light pressure and control. Avoid on thin or damaged nails; it isn’t a universal nail-prep grit. |
| 240 | Fine | Shaping natural nail edges and smoothing press-on edges | Still removes material. Light pressure matters, even with a fine file. |
These are starting points, not rules for every product. Match the file to the material, the task, and the manufacturer’s instructions.
Which nail file grit should you use for natural nails?
Start with 240 grit for shaping the free edge of your natural nails, especially if you’re a beginner or your nails are thin or prone to peeling. The free edge is the part extending beyond your fingertip.
As you get more comfortable controlling your hand movements and pressure, you can consider 180 grit for shaping healthy, firmer nail edges, if the file is designed for that use. Use a light touch and check your progress often.
Think of 180 as another option for a specific task, rather than an upgrade you need to work toward. If 240 gets the shape you want, there’s no need to switch. For fragile nails or a small snag, stay with the gentler option.
Avoid 100 grit on natural nails, whether you’re working on the edge or the surface. It’s much easier to remove more than you intended with a coarse file.
For help choosing and creating a shape, read how to shape your nails at home for beginners.
Is shaping the edge the same as buffing the nail surface?
No. Shaping the free edge changes the nail’s outline. Buffing the nail plate removes material from the surface of your nail.
Personally, I usually use 180 grit when preparing my bare nails before applying polish. In my own routine, I find that 240 can leave the surface smoother than I prefer for adhesion. That’s my experience with my routine, though, not a rule that every polish needs a rougher surface.
If you’re a beginner, start with 240 for learning to shape the free edge and get comfortable with gentle pressure and controlled movements. For surface preparation, follow your polish or gel system’s instructions from the beginning. Don’t choose a coarser grit just because you feel more confident with a file.
If your system specifies 180 grit, use the intended tool with a light touch. The aim is the preparation that product requires, without repeatedly filing the same area or trying to create deeper scratches. If you aren’t confident controlling that step, get guidance before continuing.
The goal is to prepare for the product you’re using, without unnecessarily thinning your nails.
Which nail file grit should you use for gel nails?
First, check what you mean by “gel nails.” Gel polish over your natural nails and a thicker builder or hard gel enhancement need different approaches.
Shaping a gel enhancement
A 180 grit file is commonly used for shaping and refining enhancement product. A 100 grit file may be appropriate for reducing bulk on a thicker enhancement when the product system calls for it, but it removes material quickly and needs careful control.
For a small edge adjustment, a finer file may be enough. You don’t need to use the coarsest file just because the nail is artificial.
Work in small amounts and check frequently. As the product gets thinner, there’s less room for error. If you can’t tell where the enhancement ends and your natural nail begins, stop rather than filing until you find out.
Removing gel polish
Don’t choose a 100 grit file simply because you’re removing gel polish. Check the removal instructions for your exact product first.
Some soak-off systems call for lightly filing the top layer before soaking. Others use a different removal process. If filing is required, follow the specified tool and grit, and avoid filing through the colour into your natural nail.
Hard gel generally needs filing for removal, while soak-off gels are designed for removal with the specified solvent and method. Builder gels vary, so the words “builder gel” alone don’t tell you whether a product soaks off.
Don’t peel, pry, or force gel away. If removal requires filing that you’re not comfortable controlling, have a trained nail professional help.
For more beginner guidance, see my DIY gel manicure guide: 12 things you should know before you start.
Which nail file grit should you use for press-ons?
For many press-ons, 180 grit works for shortening and shaping, followed by 240 grit to smooth the edge. If you’re making a tiny adjustment or the tip is thin and flexible, try 240 first.
Press-ons vary in material, thickness, and finish. Follow the brand’s instructions, and take extra care with finished sets so you don’t file away the design or damage the coating at the edge.
When shaping an unpainted tip for a handmade set:
- Hold the tip securely without bending it.
- Make a few light passes, then check the length and outline.
- Compare both sides so you don’t gradually narrow one side more than the other.
- Smooth any roughness with the finer side of your file.
Shaping a press-on and preparing your natural nail for application are separate steps. Don’t automatically use the same file or pressure for both.
Likewise, filing the tip’s underside or preparing its surface for gel should follow the tip and coating manufacturers’ instructions. An edge-shaping recommendation isn’t a universal surface-prep recommendation.
For the full process behind a handmade set, read how I create a custom press-on nail set.
180 vs 240 grit nail file: which should you choose?
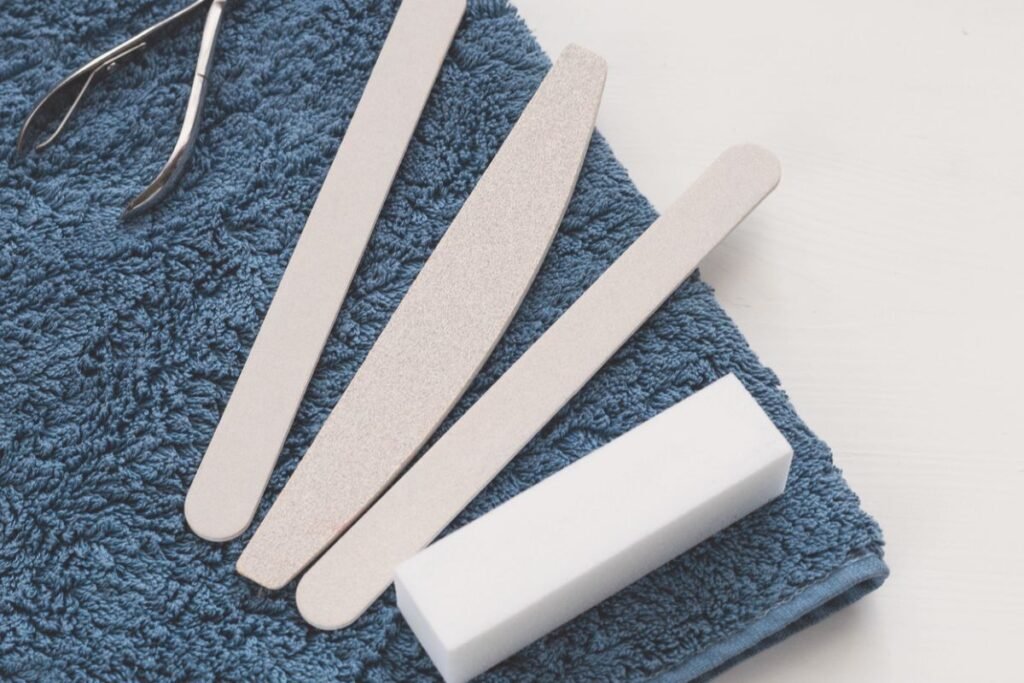
If you mostly wear natural nails, start with a 240 grit file. You can shape and smooth the edges without adding a coarser tool you may not need.
If you also make or wear press-ons, a 180/240 file gives you two useful options: 180 for suitable tip-shaping tasks and 240 for gentler edge work.
A 100/180 file is more relevant when you work with enhancement product that calls for those grits. It isn’t the default choice for every at-home manicure.
Nail files and kits to consider
Choose based on the work you actually do:
- Makartt 180/240 nail files: A dual-grit option to consider for press-on shaping and finer edge work. Use the 240 side as your starting point for natural nail edges.
- Makartt 100/180 nail files: An option for suitable enhancement work. Keep the 100 side off your natural nails.
- Subay manicure file and buffer kit: An option if you need several tools. Check the current listing for the included grits rather than assuming every piece suits natural nails.
You don’t need all three. Start with the grit you need, then add tools when you have a specific use for them.
For the rest of a basic kit, see 8 must-have nail tools for an at-home manicure.
How to file without overdoing it
The grit matters, but so do pressure and repetition. Even a fine file can remove too much if you keep working over the same area.
- Use light pressure. Let the abrasive surface do the work.
- Support the nail or tip. Avoid bending it as you file.
- Check every few strokes. It’s easier to take off a little more than put length back.
- Be gentle around the sidewalls and skin. Don’t keep narrowing the nail while chasing perfect symmetry.
- Stop when the edge is smooth. More filing doesn’t automatically mean a better result.
Filing shouldn’t hurt. Stop if you feel pain, heat, or unusual sensitivity. Don’t try to smooth away a thin or damaged area by filing it further.
If your nails already feel sore or fragile after removal, read why nails become damaged after removal and how to care for them. Persistent pain or nail changes should be assessed by a healthcare professional.
Common nail file grit questions
Is 100 or 180 grit coarser?
100 grit is coarser. It removes material faster than 180 grit, so it needs more caution and should be reserved for suitable artificial product.
Can you use 180 grit on natural nails?
Some files are designed for light shaping of healthy natural nail edges at 180 grit. But 240 grit is the better starting point for beginners and fragile nails. Don’t treat an edge-shaping recommendation as permission to file the nail surface.
Is 240 grit only for finishing?
No. A 240 grit file can shape and shorten natural nails as well as smooth their edges. It can also help refine a press-on edge after shaping.
Does a higher grit number mean a stronger file?
No. A higher number means a finer abrasive surface. For these files, 100 is coarser than 180, and 180 is coarser than 240.
If you’re choosing your first file, begin with what you’ll use it for most: natural nail edges, enhancement product, or press-ons. You can build a useful little kit without buying every grit on the shelf.
Final thoughts
The right nail file grit depends on what you’re filing and what you want to achieve. A 180/240 file is a practical addition to your kit for natural nail edges and press-on shaping.
If you’re a beginner, start with the 240 side while you get comfortable controlling your movements and pressure. You can try 180 for suitable shaping tasks as your control improves, but there’s no need to switch if 240 is doing the job.
For surface prep or product removal, follow your specific system’s instructions. Use a light touch, check your progress often, and stop once you’ve achieved what you need.
Related posts
- How to shape your nails at home for beginners: a step-by-step guide
- DIY gel manicure for beginners: 12 things you should know before you start
- How to create a custom press-on nail set (step-by-step behind the scenes)
- 8 must have nail tools for a perfect at home manicure
- Damaged nails after removal? Why it happens and 7 tips to repair them