12 Easy Nail Art Ideas for Beginners (Using Just a Brush & Dotting Tool Set!)
If you’ve ever looked at nail art on Instagram or Pinterest and thought, “I could never do that,” let me stop you right there you absolutely can.
The trick isn’t fancy equipment or years of experience. It’s having the right basic tools, a little patience, and knowing a few easy techniques that look far more advanced than they really are.
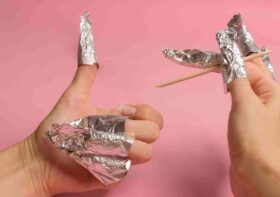
When I owned my nail studio, I used to spend hours perfecting tiny details but honestly, most of those designs started with the same simple tools: a good brush and dotting set (like this one). Even now, when I do my own nails or create press-on sets, this is still what I reach for.
Whether you’re doing your own gel nails or just painting regular polish, here are 12 easy DIY nail art ideas that you can absolutely nail (pun intended) with this brush and dotting tool set.
1. Polka Dot Nails
Let’s start simple, the classic polka dots.
Using your dotting tool, dip the tip into your polish and press it gently onto your nail. Keep your hand steady, and make sure to re-dip for consistent dot size.
You can do simple white dots over a nude base for an everyday look, or go for rainbow dots for something fun and playful.
Pro tip: Dip the dotting tool into polish and gently press straight down, don’t drag for perfectly round dots. You can also alternate dot sizes for a chic, playful look.
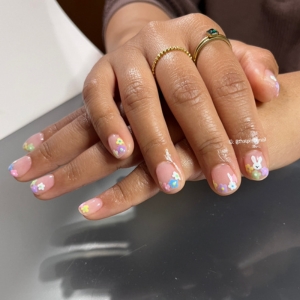
2. Daisy or Floral Nails
Once you’re comfortable with dots, you can turn them into flowers!
Place five dots in a circle, then one in the middle for the center of your daisy. Add leaves using a fine liner brush.
These look adorable on one accent nail or across your full set. I share a detail guide in How To Do Your Own Gel Nails At Home Like A Pro perfect if you’re learning to do designs on gel polish.
Tip: You can even use a fine liner brush to paint stems or leaves.
3. French Tips
The French tip is timeless, but you can modernize it easily.
I start by marking a small center line at the tip to decide how high the smile line should go. Then I draw curved lines from each side and fill in the color.
You can also use an angled brush to create a smooth curve. Swap the traditional white for seasonal shades, burgundy for fall, pastel pink for spring, or chrome for a glazed-donut effect.
If your hand shakes a little (we’ve all been there), work in short strokes instead of one big swoop.
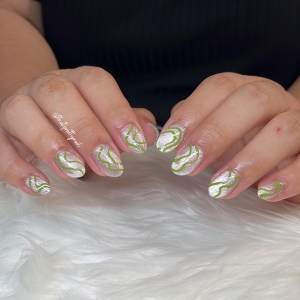
4. Abstract Swirls
Swirls are everywhere right now, and they’re beginner-friendly.
Use a thin liner brush and create random curved lines using two to three colors that complement each other. The beauty is in the imperfection, each nail can be different, and it’ll still look cohesive. You can’t mess them up.
5. Simple Heart Nails
Hearts look tricky, but they’re just two dots joined at the bottom!
Use your dotting tool to place two side-by-side dots, then drag them down with your brush to form a heart.
Try soft pink or red for a sweet everyday design, or go metallic for something bolder. These look great as tiny accents on neutral nails.
6. Line Art Nails
If you love minimal, modern looks, this one’s for you.
With your thinnest brush, draw fine black or white lines over a sheer nude base. Think minimalist squiggles, waves, or geometric outlines.
This clean style pairs beautifully with short or medium nails, it looks expensive but takes only minutes.
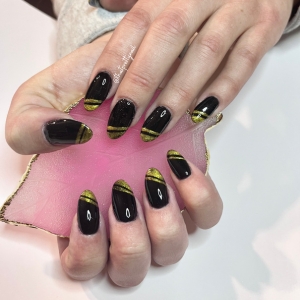
7. Color Block or Flannel Patterns
Time to use your flat brush!
This one is such a handy tool, I reach for it all the time. You can use it to create crisscross designs like flannel patterns or even block off sections with nail tape and fill each one with a different color.
It’s great for those trendy, graphic looks using contrasting shades like beige and navy, or pink and orange. But it’s also perfect for creating larger petals in floral designs when you want soft, rounded shapes instead of fine lines.
And if you’re feeling festive, this brush is surprisingly good for character art too I actually used it to make a cute mummy design for Halloween recently, and it turned out adorable!
@thatprettynail Need a last-minute Halloween nail idea? 👻 This mummy design is so easy to do. I used @ModelonesOfficial fall color set and some tools I already had (they’re linked in my bio if you’re curious). #simplehalloweennails #halloweennailart #spookynails #mummynails #halloweennails ♬ Spooky – Bonoy HR
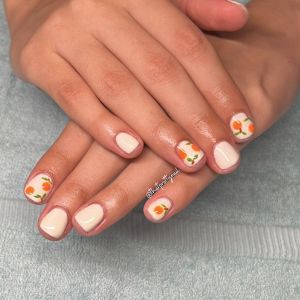
8. Fruit-Inspired Nails
Tiny strawberries, lemons, or cherries they look harder than they are.
Your dotting tools make perfect fruit shapes, and your liner brush helps with leaves and stems.
For strawberries, make small red dots and tiny white seeds. For cherries, do two red circles connected by a green line.
They’re bright, summery, and guaranteed to make you smile every time you glance at your nails.
9. Sparkle Nail Design
Here’s one for all the detail lovers.
Use a thin liner brush to draw a small cross in the center of your nail, then add short curved lines extending from each tip to create that twinkling diamond-star effect.
For a little extra dimension, you can also add a few tiny polka dots around your sparkle, it helps the design pop and looks so cute under light.
10. Snowflake Nails
A winter classic!
Use your dotting tool to place one central dot and six evenly spaced dots around it. Then connect them with your thin brush to form a snowflake. Add small branches or extra dots for more detail.
Top it off with a shimmery or holographic polish it looks magical under light.
11. Glitter Fade (or Ombre)
Your fan brush is perfect for this.
Dip the tips into glitter polish and lightly sweep it downward from the nail tip for a soft gradient effect.
This gives your nails a sparkly, elegant finish that hides imperfections beautifully. You can also use colored polish for a subtle ombré if glitter isn’t your thing.
12. Hibiscus or Tropical Flowers
One of my favorite summer designs.
Use your dotting tool to make five large dots for petals, then drag each dot inward using a thin brush to shape the petals. Add a bright center dot and a fine yellow line for the stamen.
Pair it with coral, turquoise, or sky-blue polish for that tropical, vacation-ready vibe.
Whether you’re painting dots, flowers, or abstract art, remember this: practice makes progress.
Every time you experiment with your brushes and dotting tools, you’ll discover something new and feel a little more confident.
You don’t need fancy supplies or expensive tools, just a simple brush and dotting set gives you everything you need to create designs that look professionally done, even if you’re just starting out.
Once you’re comfortable, try mixing techniques like a gradient background with floral accents, or abstract brushstrokes topped with sparkles. Nail art doesn’t have to be perfect; it just needs to feel like you.
If you’re new to DIY nails, check out these next:
- How To Do Your Own Gel Nails At Home Like A Pro
- How to Shape Your Nails at Home for Beginners: A Step-by-Step Guide
- Step-by-Step: Remove Your Gel Nails at Home (With and Without Acetone)
- 8 Must Have Nail Tools for a Perfect At-Home Manicure
Want more inspiration?
Head over to the Nail Art category to explore the newest Instagram-inspired designs, trends, and beginner-friendly looks I’ve featured on the blog.
💌 Want more fun reads like this?
Subscribe to my newsletter to get nail art ideas, product tips, and behind the scenes stories straight to your inbox.
You’ll be surprised how quickly your skills improve once you start experimenting and how rewarding it feels to wear designs you created yourself.