How to Set Up a Home-Based Nail Studio + Find Clients From Scratch
This post contains affiliate links. I may earn a small commission if you shop through them, at no extra cost to you.
Setting up a nail studio from home is exciting, but it can feel overwhelming, especially if you’re just getting started. After running my studio for over a year and a half — and eventually closing it — I’ve learned what truly works (and what doesn’t). In this post, I’ll walk you through how I set up my nail studio at home, the tools I recommend, what I’d do differently next time, and how I found clients without any social media following.
Whether you’re on a tight budget or planning a full glam space, this guide walks you through everything I wish I knew when I started.
Step 1: Choose the Right Space in Your Home
Before anything else, ask yourself:
What services will you offer?
- Manicures? Pedicures? Lash lifts?
- Each service requires different tools, furniture, and layout planning. You don’t have to offer everything at once, but it’s important to know your focus so you can design your space and budget accordingly.
How much space will you need?
- Think about your workflow: where you’ll sit, where your client will sit, and how you’ll move around during each service.
- I didn’t think this through at first and ended up bumping into shelves more than I’d like, so trust me, planning ahead makes a big difference.
Will clients walk through your main home?
- I got lucky with a bare room in the basement. It wasn’t fancy, but it had a side entrance and a private washroom. That setup made a huge difference in terms of privacy and client comfort.
Do you have access to a clean washroom and tool-cleaning area?
- Some home studio owners work out of their bedroom, and that’s totally okay if it suits your space. But do keep in mind that clients appreciate having a clean, accessible washroom and a professional-feeling setup.
- In my case, having a separate space for handwashing and cleaning tools helped me feel more confident and made my clients more comfortable too.
Step 2: Set Up a Functional Studio on a Budget
You don’t need a Pinterest-perfect nail room to get started. If you’re working with a limited budget, the key is to focus on function first and build from there.
Start with the basics
When I first opened, I used a simple setup:
– A nail desk
– A drawer for tools
– One basic shelf for supplies
It wasn’t fancy, but it got the job done.
Offer services to friends
Before making big investments, I did a 6-month soft launch by doing nails for friends. It helped me build confidence, get real client feedback, and collect content for social media all without financial pressure.
Upgrade later
Once bookings picked up, including messages from people I didn’t know — that’s when I reinvested. I redecorated the room, added better storage, and bought higher-quality tools over time.
Don’t overspend too early
It’s tempting to buy cute decor or stock up on supplies, but trust me: function matters more than aesthetics at the beginning. Focus on creating a clean, comfortable, and organized workspace. The fancy touches can come later, once you know what works for your workflow.
Step 3: Choose Tools & Equipment Worth the Investment
If you’re starting a home-based nail studio, choosing the right tools can save you time, stress, and even your posture. Here’s what I used, what I wish I bought sooner, and what I recommend if you’re just starting out.
Manicure Essentials
- Dust Collector
I started with a basic one from Amazon. It technically worked, but it was loud and the suction wasn’t great. It made conversations harder with clients and didn’t catch fine dust well — which matters especially when you’re working at home.- If you can, invest in a quiet, high-suction dust collector like this one for a cleaner and more comfortable setup.
- E-File (Nail Drill)
Cheap drills may seem budget-friendly, but they’re harder to control and can easily damage natural nails. Look for one with adjustable RPMs, low vibration, and smooth handling.- This is the nail driller I’ve been using, affordable, long lasting but the vibration isn’t the lowest.
Pedicure Must-Have
- Nail Drying Fan
If you’re using regular polish for pedicures, a drying fan is a lifesaver. Regular polish takes forever to dry (especially in cooler basement setups like mine).
A small fan with warm air settings will reduce smudging and speed up appointment flow.- I love this two-mode nail drying fan.
Lash Services
- Sturdy Lash Bed: A solid bed makes all the difference for both you and your clients. Some of the cheaper beds I tried wobbled when clients moved. Look for something stable, ideally with adjustable height.
- Comfortable Chair: I had an adjustable chair, but I still found myself hunched over and uncomfortable. Test out the height + posture before buying.
- Bright Lighting
Lighting is key, especially for lash lifts or extensions. Ring lights are okay, but go for one with a wide diameter and adjustable brightness.
What I’d Do Differently (So You Don’t Have To)
Looking back, there are a few things I wish I had done differently when setting up and running my home nail studio. These are the lessons I learned the hard way, and hopefully, you won’t have to.
- Buying an LED sign from AliExpress
Was it cute? Yes.
Was it worth it? Not really.
I bought a custom LED sign online, but it needed a plug converter, had no on/off switch, and no dimmer or timer. On top of that, I ended up paying extra for customs, so the total cost was higher than just buying one locally. - Using bulky bookshelves
I placed bookshelves behind my nail desk thinking they’d be helpful… but they just made the room feel cluttered and tight. I kept bumping into them, and the open shelving made everything look messier. - Overbuying supplies
I was so excited when I started that I bought more than I needed and ended up with unused products until the day I packed up the studio.
My advice: Start with essentials only, then restock as your client base grows. It’s better for your budget and your storage space.
How I Found Clients from Scratch (With No Following)
You don’t need a big following to build a client base, I started with zero. Here’s exactly what worked for me when I was starting out from scratch:
Word of Mouth
I offered a soft launch to friends, coworkers, and family with discounted rates. They told their network, and that’s how the momentum began.
Never underestimate the power of a good referral especially when you’re just starting out.
Instagram Ads + Giveaways
I ran local ads using real photos of my work no stock photos, no discounts. I focused on showcasing designs and running small giveaways to increase visibility and engagement.
Important: Target your ads to your city or postal code to avoid wasting budget on areas too far away.
Facebook Marketplace
I got a few clients from Marketplace, but it was hit or miss. It’s worth trying, but be cautious, some posts got flagged due to Facebook’s rules on service listings.
Fresha Booking System + Marketplace
I used Fresha to manage bookings. Their marketplace feature helped local clients discover me, but they do take a small cut on the first booking.
Repeat clients? That’s all yours.
Google Maps (Google Business Profile)
This one’s so underrated. A few neighbors found me by searching “nail tech near me” and they became regulars.
Set up a Google Business Profile for free, add your service details, photos, and availability, and you’ll show up in local search results.
Building a home-based nail studio takes time, planning, and patience. It doesn’t have to be perfect from day one, start simple, stay consistent, and upgrade as you grow.
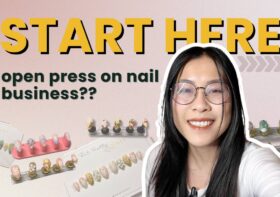
I loved my little studio, and while closing it was bittersweet, I’m excited to begin a new chapter making press-on nails and sharing everything I learn.
Want more behind-the-scenes tips and honest reflections?
Check out The Nail Files blog series — where I share real experiences from running (and now closing) my nail business at home.
Related Posts:
- How To Do Your Own Gel Nails at Home Like a Pro (Step-by-Step)
- Best Tools for DIY Nails: My Must-Haves List
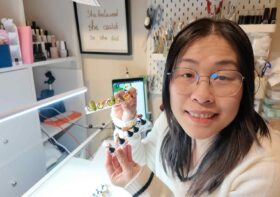
Tools I Use & Recommend (Affiliate Picks)
These are the exact tools I use in my setup and prep process. I’ve added affiliate links below so you can shop them easily — I only recommend what I actually use:
PRESS-ON SUPPLIES:
- Press-on Nail Holder Set → https://geni.us/g57oC [Amazon]
- Waterproof 5×8 Bubble Mailers → https://geni.us/qAQkrZ [Amazon]
- Phomemo Bluetooth Thermal Label Printer → https://geni.us/UAQcH [Amazon]
NAIL STUDIO MUST HAVE:
- LED Desk Lamp with Clamp → https://geni.us/rjZD9S7 [Amazon]
- MelodySusie Rechargeable Nail Dust Collector → https://geni.us/1WLLoiI [Amazon]
- Nail Dryer for Regular Polish → https://geni.us/dI5qk [Amazon]
- UV Nail Lamp 220W, UV Light for Gel Nails → https://geni.us/OaAwX4 [Amazon]
- Electric Nail Drill Machine → https://geni.us/z2trm6 [Amazon]
MY FILMING GEAR:
- DJI Osmo Pocket 3 Creator Combo → https://geni.us/qSyHM [Amazon]
- Phone Holder for Filming → https://geni.us/4HZXpzA [Amazon]